
Switching Shipping Carriers in Canada: The Checklist That Protects Your Margins
Thinking about switching shipping carriers in Canada? Use this checklist to audit your current invoices, compare real costs, and avoid losing money in the transition.

ShipSherlock Team
Every Canadian seller hits this moment eventually. A rate increase lands, a string of late deliveries burns a few customers, and you start wondering whether Purolator, UPS, FedEx, or Canada Post would treat you better than whoever you are with now.
Switching carriers can absolutely save money. It can also cost you money if you do it in the wrong order. Sellers who switch on gut feeling often trade a known set of problems for an unknown set, and give up negotiated discounts in the process. Here is the order of operations that protects your margins.
Step 1: Audit before you shop
Before you request a single quote, figure out what you are actually paying today and how much of it you should not be paying at all.
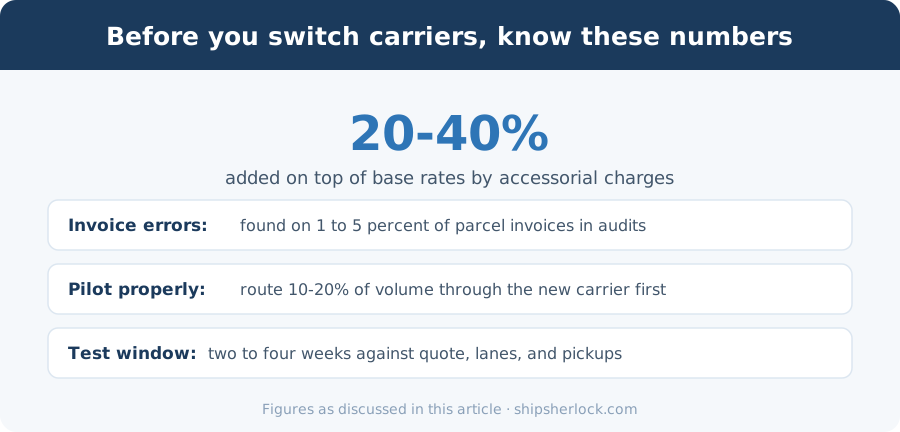
Shipping invoices routinely contain money that belongs to you: late deliveries that qualify for refunds, duplicate charges, incorrect dimensional weight assessments, and surcharges applied in error. Industry audits typically find recoverable errors on somewhere between 1 and 5 percent of parcel invoices. If you are shipping a few hundred parcels a month, that is often hundreds of dollars a year, sometimes more.
This matters for two reasons. First, that is your money and you want it back before you close the account. Second, your true cost per shipment is your invoice total minus recoverable errors. If you compare a new carrier's quote against an inflated current cost, the switch looks better than it really is.
Step 2: Know your real shipping profile
Carriers price against your specific mix, so build a simple profile from the last three months of invoices. You want your monthly parcel volume, your average billed weight (billed, not actual, because dimensional weight often governs), your top destination regions, how often you ship to residential versus commercial addresses, and your surcharge total as a percentage of base freight.
That last number surprises people. Between fuel surcharges, residential delivery fees, extended area charges, and address corrections, accessorial charges commonly add 20 to 40 percent on top of base rates. A carrier with a cheaper base rate and heavier surcharges can cost more than the one you left.
Step 3: Compare quotes on landed cost, not base rates
When quotes come in, resist the urge to compare rate cards. Instead, take 20 or 30 real shipments from your history and price them under each quote, surcharges included. This is the only comparison that reflects reality.
A few things to check while you are at it. Ask how long the quoted discounts are locked in and what volume commitment they require. Ask which surcharges are discounted, because base rate discounts frequently do not apply to accessorials. And ask about the money-back guarantee, since policies differ by carrier and service level, and guarantee terms change often enough that you should confirm the current policy in writing rather than rely on what was true last year.
Step 4: Do not leave refunds behind
This is the step almost everyone skips. When you leave a carrier, any unclaimed refunds on that account are usually gone for good, and the claim windows are short.
For UPS and Purolator account customers, late delivery refund requests generally must be filed within 15 calendar days of the invoice date. Canada Post allows 30 business days from the expected delivery date. If you are winding down an account over a month or two, run a final sweep of those last invoices before you stop watching them. Sellers regularly leave real money on closed accounts simply because nobody was checking anymore.
Step 5: Run both carriers in parallel
Do not flip a switch on a Friday. Route 10 to 20 percent of volume through the new carrier for two to four weeks and watch three things: whether invoiced costs match the quote, whether delivery performance holds up in your actual lanes, and whether pickup reliability works with your schedule. Quoted rates and delivered invoices are not always the same thing, and it is far cheaper to learn that on a small slice of volume.
Step 6: Audit the new carrier from day one
New account setups are where billing errors cluster. Discounts get keyed in wrong, the negotiated fuel surcharge cap does not get applied, or a service level is misconfigured. Check the first few invoices line by line against your agreement, or put automated auditing in place from the first shipment so nothing slips through.
The bottom line
Sometimes the audit in Step 1 changes the whole conversation. If a meaningful chunk of your pain is billing errors and unclaimed refunds rather than the carrier's rates, you may not need to switch at all. You need to recover what you are owed and hold your current carrier to the agreement you already have.
Either way, the sequence is the same: know your real costs first, claim what you are owed, then decide.
Try the free shipping audit and see in minutes what your current carrier owes you, before you decide whether to leave.
Related guides
Deadlines, eligibility and claim steps for the carriers covered above.
- Canadian Carrier Refund RulesFiling deadlines and eligible services for UPS, FedEx, Canada Post and Purolator, kept current.
- Savings CalculatorEstimate what your carriers likely owe you based on monthly shipping volume.
- Shipping Audit for Canadian SellersWhat a full invoice audit checks, and how much sellers typically recover.
Stop overpaying
Done reading? Start recovering.
ShipSherlock audits every invoice automatically. You pay nothing unless we find money your carrier owes you.